Opportunity Custom Fields in TheraSaaS give practices the flexibility to tailor their CRM experience to match their exact intake and client-matching workflows. By creating and organizing these fields, you can track the information that matters most—such as client preferences, therapist specialties, intake dates, and service types—all from one centralized location.
These fields not only display inside each opportunity card within your visual pipeline, but they also integrate seamlessly with filters, reporting, and automation, helping you streamline every step from lead intake to client onboarding and ensuring the entire admin team is on the same page.
Why Custom Fields Matter
Every therapy practice is unique. Whether you specialize in couples counseling, child therapy, or trauma-informed care, you need a way to track the details that define your clients’ needs and preferences.
Custom Fields let you:
Capture key intake information at a glance.
Match clients to the right therapist based on criteria like specialization, availability, or insurance.
Standardize your intake process across team members.
Enable automation for follow-ups, reminders, and onboarding.
Add Partner's, family member's, or child's information where a family member is a main point of contact.
Accessing Custom Fields
You can access the Custom Fields dashboard in TheraSaaS in two ways—choose whichever fits your workflow best:
Option 1: Via Settings
From your account dashboard, open Settings and scroll down to select Custom Fields.
This takes you directly to the Custom Fields dashboard where you can manage and organize your fields.
Click On Folders & Select Opportunity:
Step 1: Create New Folder—Opportunity Details represent a single default folder inside the Opportunity Card:
Create a new folder with a set of custom fields:
Here are some of the most common use cases:
a) Intake/ Scheduling Details/ Triage
b) Payment Information
c) Therapist Matching
d) Family/Parner's information etc.
Note: Make sure to select Opportunity instead of Contact for grouping the new custom fields:
Step 2:
Creating a New Custom Field
Custom fields allow you to capture unique data for each opportunity—like a client’s therapy goals, intake session details, type of therapy, insurance coverage, or preferred session type.
To add a new field:
Click + Add Field in the upper right corner.
Choose your Field Type based on what information you want to collect.
Assign the field to Opportunity so it appears within your intake pipeline.

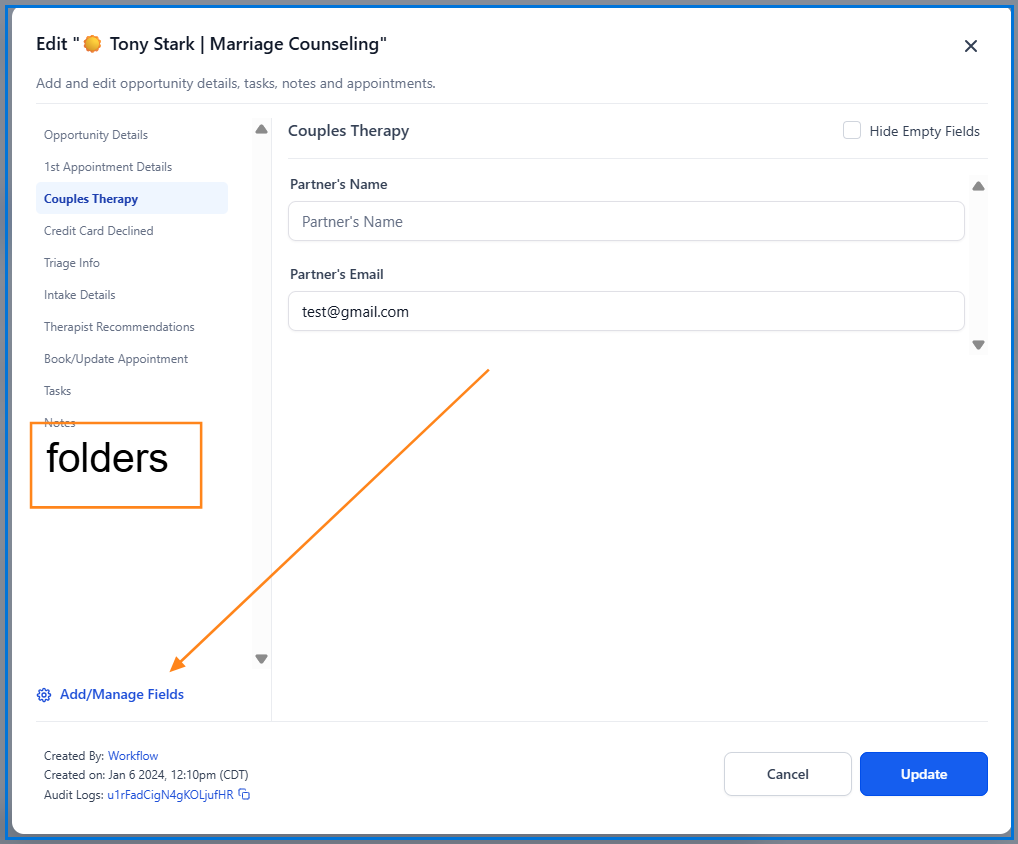
Option 2: Via Opportunity Card
Inside the Opportunities section, select any existing opportunity and click Add/Manage Fields.
This shortcut takes you to the same dashboard—perfect for editing while reviewing an active client opportunity.
Field Types and Examples for the Practices
| Field Type | Example Use Case |
|---|---|
| Single Line | Client’s preferred therapist or referral source |
| Multi Line | Intake notes or therapy goals |
| Text Box List | Manually Added Details about intake |
| Number | Payment Details |
| Phone | Secondary Partner/ Family member's contact information |
| Monetary | Client’s session rate or insurance copay |
| Dropdown (Single) | Type of service (e.g., Individual, Couples, Family) |
| Dropdown (Multiple) | Therapeutic approaches requested (e.g., CBT, EMDR, DBT) |
| Radio Select | “Has completed consent form?” (Yes/No) |
| Checkbox | “Requires specialized therapist?” |
| Date Picker | Intake date, follow-up date, or projected start date |
| File Upload | Upload intake forms or consent documents |
| Signature | Collect e-signature directly from the client |
Tip: For seamless automation, use dropdowns or checkboxes whenever possible. They make it easier to trigger workflows (e.g., send an onboarding email when “Consent Form Signed” = Yes).
Organizing Fields with Folders
As your practice grows, so will your number of custom fields. Organizing them into folders keeps everything tidy and easy to navigate.
How to Create a Folder:
Click Add Folder in the Custom Fields dashboard.
Give it a descriptive name (e.g., “Client Info,” “Therapist Matching,” or “Billing Details”).
Select Opportunity as the object.
Click Save to finalize.
Folders make it simple to find fields related to intake, preferences, or administrative details without searching through an unorganized list.
Managing and Optimizing Fields
TheraSaaS gives you several tools to maintain an organized and efficient setup:
1. Group by object:
Contact or Opportunity Fields
2. Group by Folder
Group fields by folders like “Client Preferences” or “Insurance Info” for faster access.
3. Bulk Actions
Quickly edit, move, or delete multiple fields at once—saving time during setup or cleanup.
4. Reorder Fields:
Drag and drop fields to control their display order within your Opportunity cards. Place the most important details (e.g., client name, session type, therapist match) at the top for easy visibility.

By using Opportunity Custom Fields effectively inside TheraSaaS, your practice can turn every intake into a streamlined, personalized experience—helping clients feel understood from the very first interaction and helping ensure centralized information storing for your intake team.
Was this article helpful?
That’s Great!
Thank you for your feedback
Sorry! We couldn't be helpful
Thank you for your feedback
Feedback sent
We appreciate your effort and will try to fix the article