Configure and understand how TheraSaaS Events lets you run workshops, groups, and trainings on your own branded pages instead of a generic registration screen.
This guide explains what Events are for, how practices typically use them, how to set up an event with a custom registration form, and how to manage registrations once people start signing up.
1. What TheraSaaS Events Are & Why Use Them
1.1 What TheraSaaS Events Do
TheraSaaS Events lets you run an entire event from one place: sell tickets or take RSVPs, sync registrants to your CRM automatically, track attendance, and see live registration data. Every event also gets a built-in public page with customizable sections including About, Tickets, Schedule, Speakers, Location, Hosted By, and FAQs, your own cover image and organizer profile. You can use that default page as-is or build your own branded landing page and embed the same registration form on it.
Note: When you create an event, you choose Ticketed or RSVP up front, this cannot be changed later. Pick carefully based on whether you'll ever charge for the event, even a small fee.
Common Ways Practices Use Events
Practices on TheraSaaS commonly use Events for:
- Free community workshops (grief support, parenting groups, stress management)
- Paid psychoeducation or skills-based groups (DBT skills, mindfulness series)
- Trainings or educational sessions for referring providers
- Open houses or "meet the therapist" sessions for prospective clients
- Support group info sessions with limited capacity
- Staff trainings or internal retreats
- Multi-session trainings with several speakers, using the built-in schedule and speaker-profile features
How to Set Up an Event
Step 1: Create Your Event
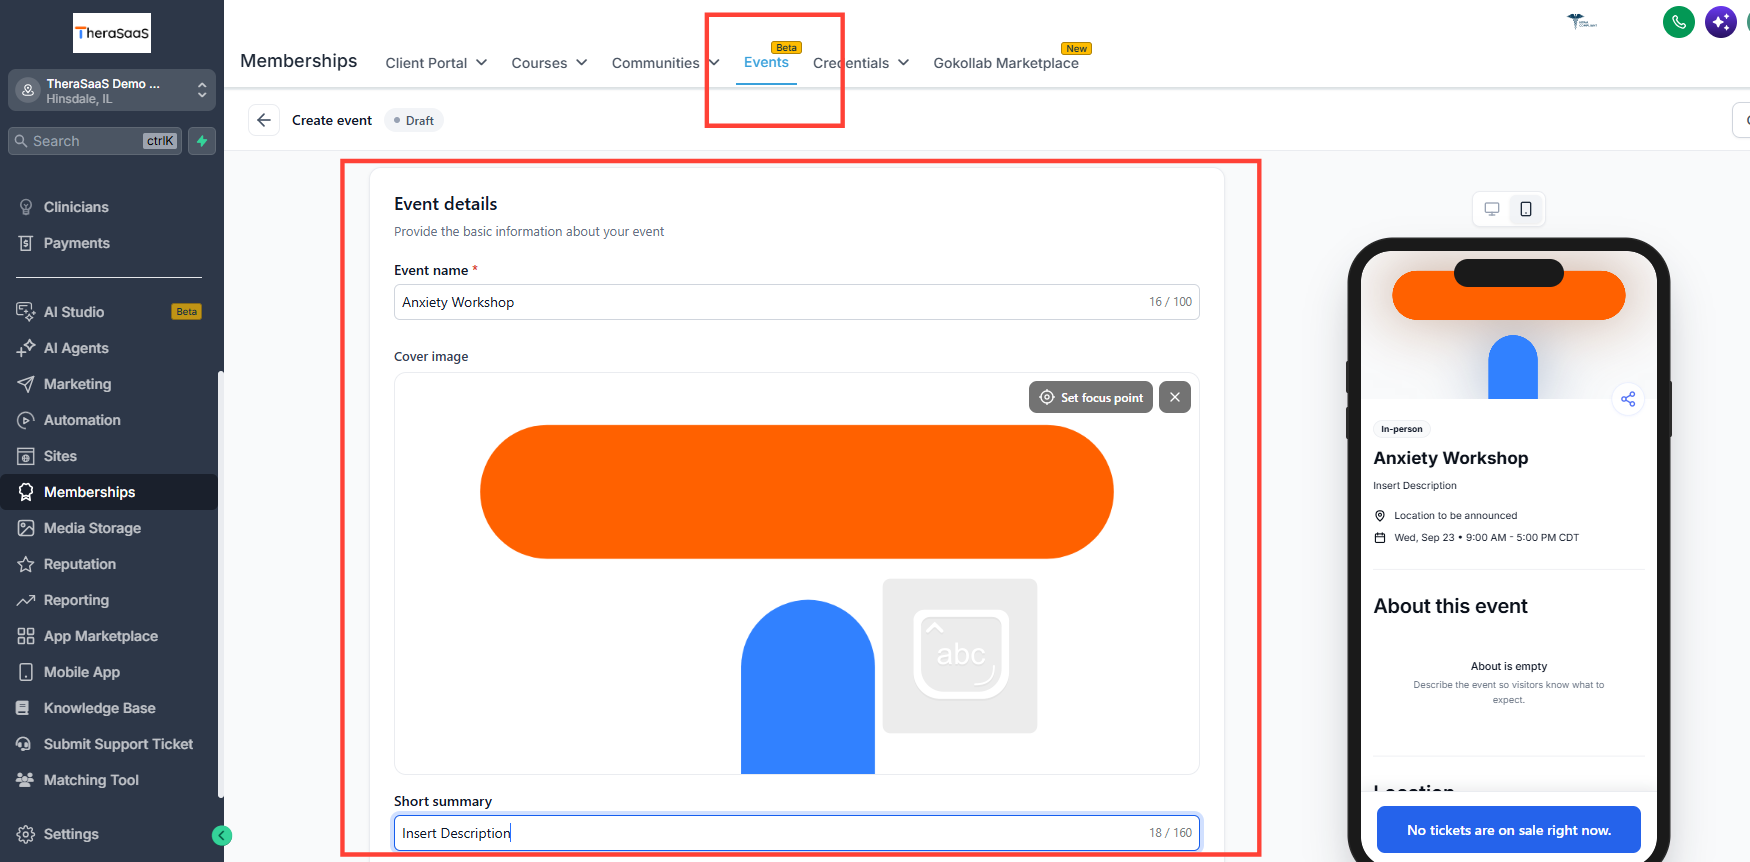
Go to Memberships > Events and click to create a new event. Choose your event type:
- Ticketed — for events with one or more paid pricing tiers
- RSVP — for free events where you just need a headcount
Before setting up any paid ticket tier, connect Stripe (or another supported payment processor) to your TheraSaaS account. A Ticketed event can't process payment on paid tiers until a payment integration is active — do this before you start building pricing, not after you've already promoted the event. Free ($0) tiers don't require this.
Note: Choose Ticketed vs. RSVP carefully, you cannot switch between them after the event is created. If there's any chance you'll charge for the event later, start as ticketed with a $0 tier instead.
Fill in your event name, summary, and description, then continue through date/time, location (in-person or online), and organizer details, and create the event.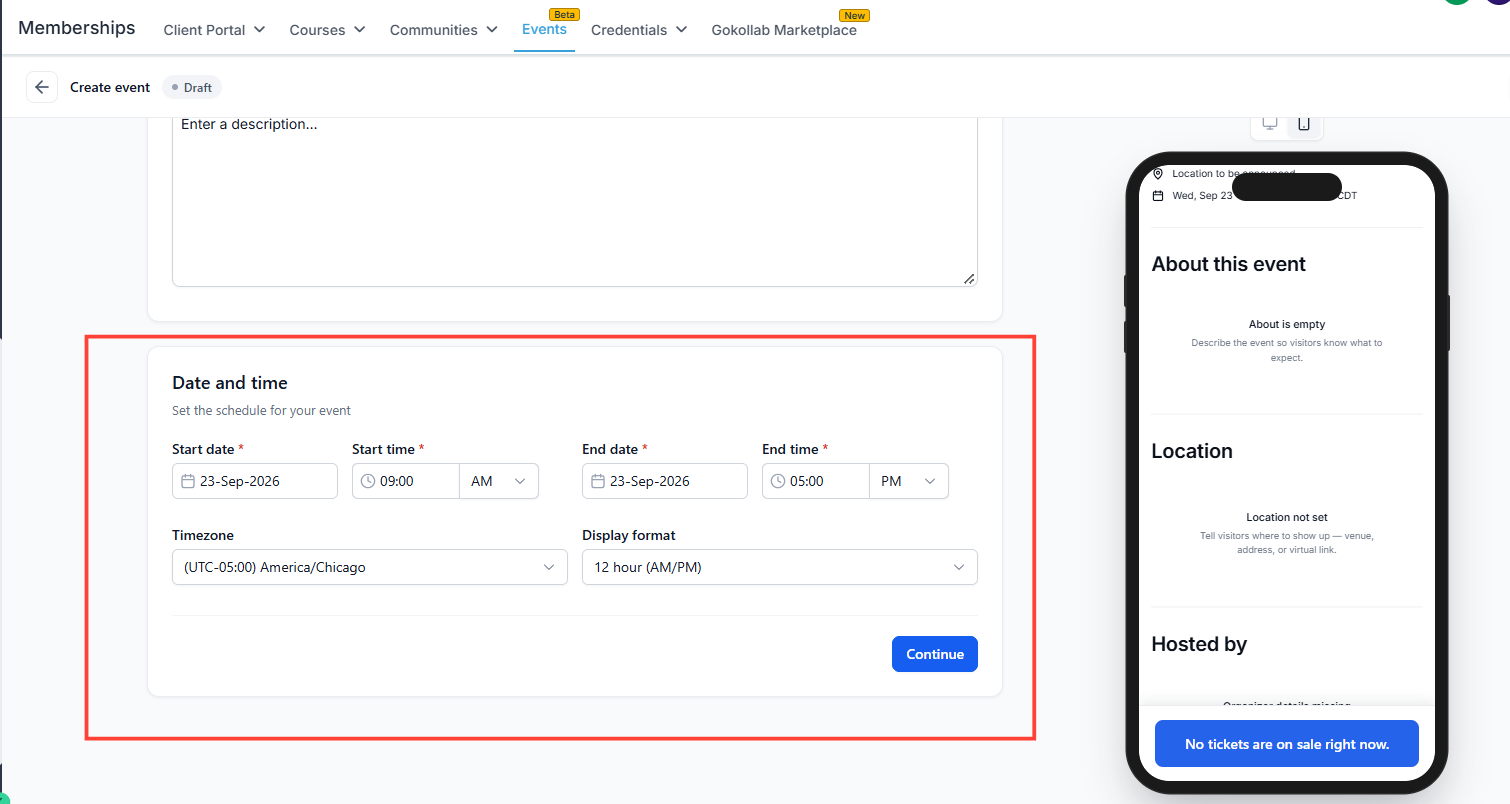
Step 2. Set Up Ticket Types
Under the event's Tickets tab, define your pricing tiers. For each ticket, set a name, price (or mark it free), a quantity cap, and, optionally, a specific sale start/end window. Tickets carry a status (On Sale, Paused, Hidden, Not Yet on Sale, Sale Ended) so you can control visibility without deleting anything.
| Ticket | Price | Quantity |
|---|---|---|
| General Admission | $50 | 100 |
| Sliding Scale / Community | Free | 20 |
Note: You can also create coupon codes with a percentage discount, an active date range, and a usage limit that can be useful for sliding-scale attendees, referral partners, or repeat group members.
Next, Build Your Registration Form
Go to Sites > Forms and create a new form. Give it a name tied to the event (e.g., "Grief Support Registration"). Add whatever fields you want to collect, then add the Sell Products element — this connects the form to your event.
Under the form's Products settings, click Add Product and select your event. Your ticket tiers will pull in automatically; remove any tiers you don't want offered on this particular form, then save.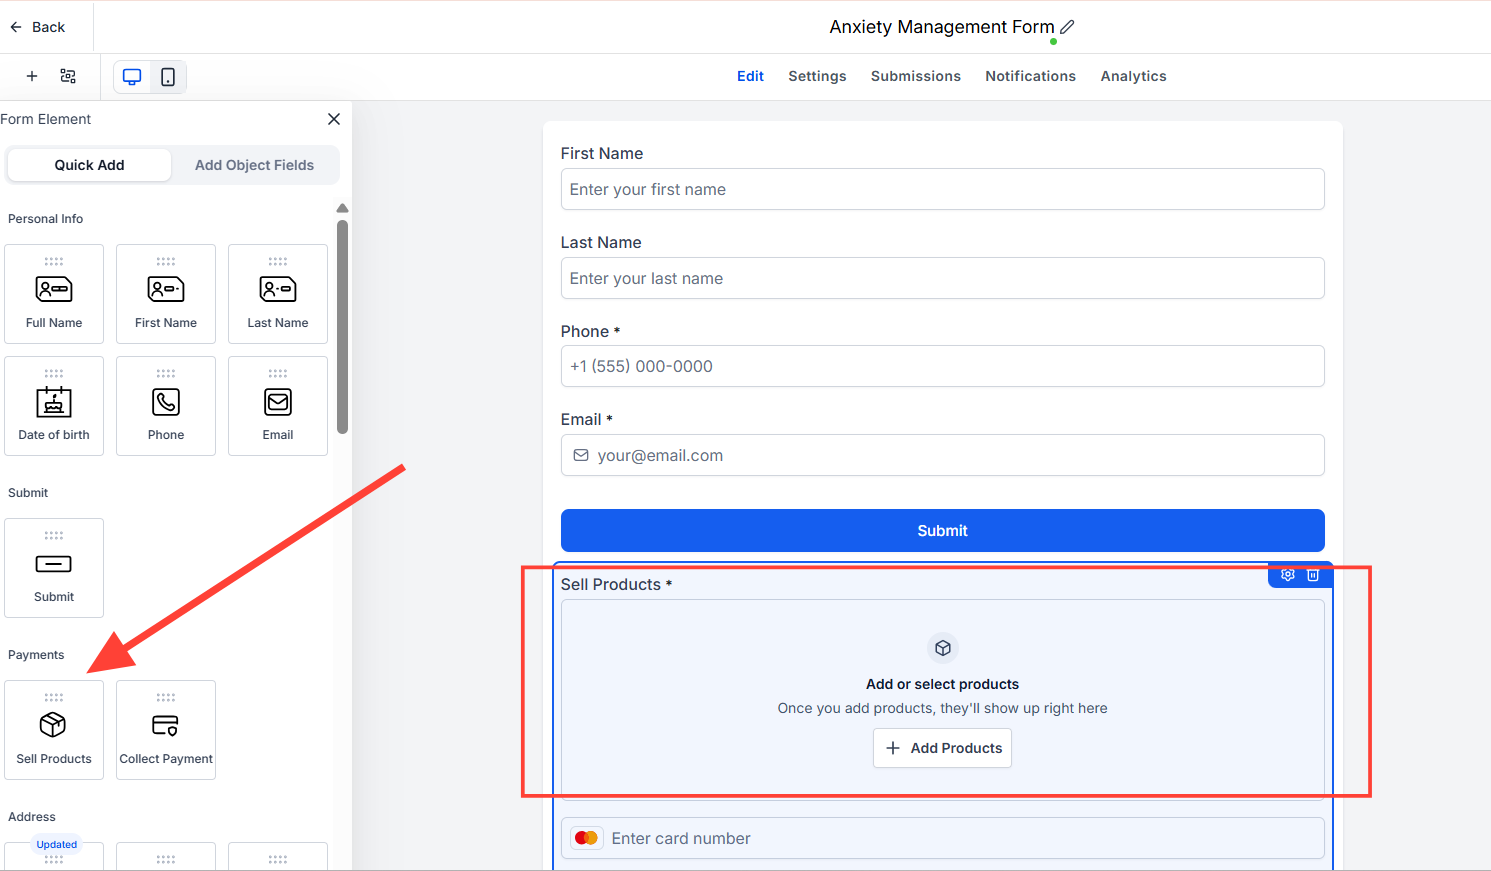
Next, Embed the Form on Your Landing Page or Website
Inside the form, click Integrate, then Copy Embed Code, and paste it into any funnel or website page.
Note: TheraSaaS's AI Studio can also generate a landing page for you: describe the event and paste the embed code in as the call-to-action.
RSVP-Only Events (No Card Required)
For free events, edit the form's Sell Products element, remove any paid ticket tiers, then toggle off "Require card for $0 orders." Attendees only submit name, email, and phone to register.
Managing Registrations After Launch
3.1 Viewing & Checking In Attendees
Under the event's Registrations tab, view every signup with attendee details, ticket type, and status. Check attendees in manually, or scan their QR code / PDF ticket for real-time verification at the door.
If you have walk-in registrants or someone who signed up by phone, use Add Attendee to register them manually, as this bypasses the public checkout entirely.
3.2 Notifications & Reminders
Attendees automatically receive confirmation and reminder emails. As the organizer, you get alerted on each new registration and can also opt into a daily summary email (sent at 9 AM in your event's timezone) — useful for keeping tabs on a group filling up over several weeks.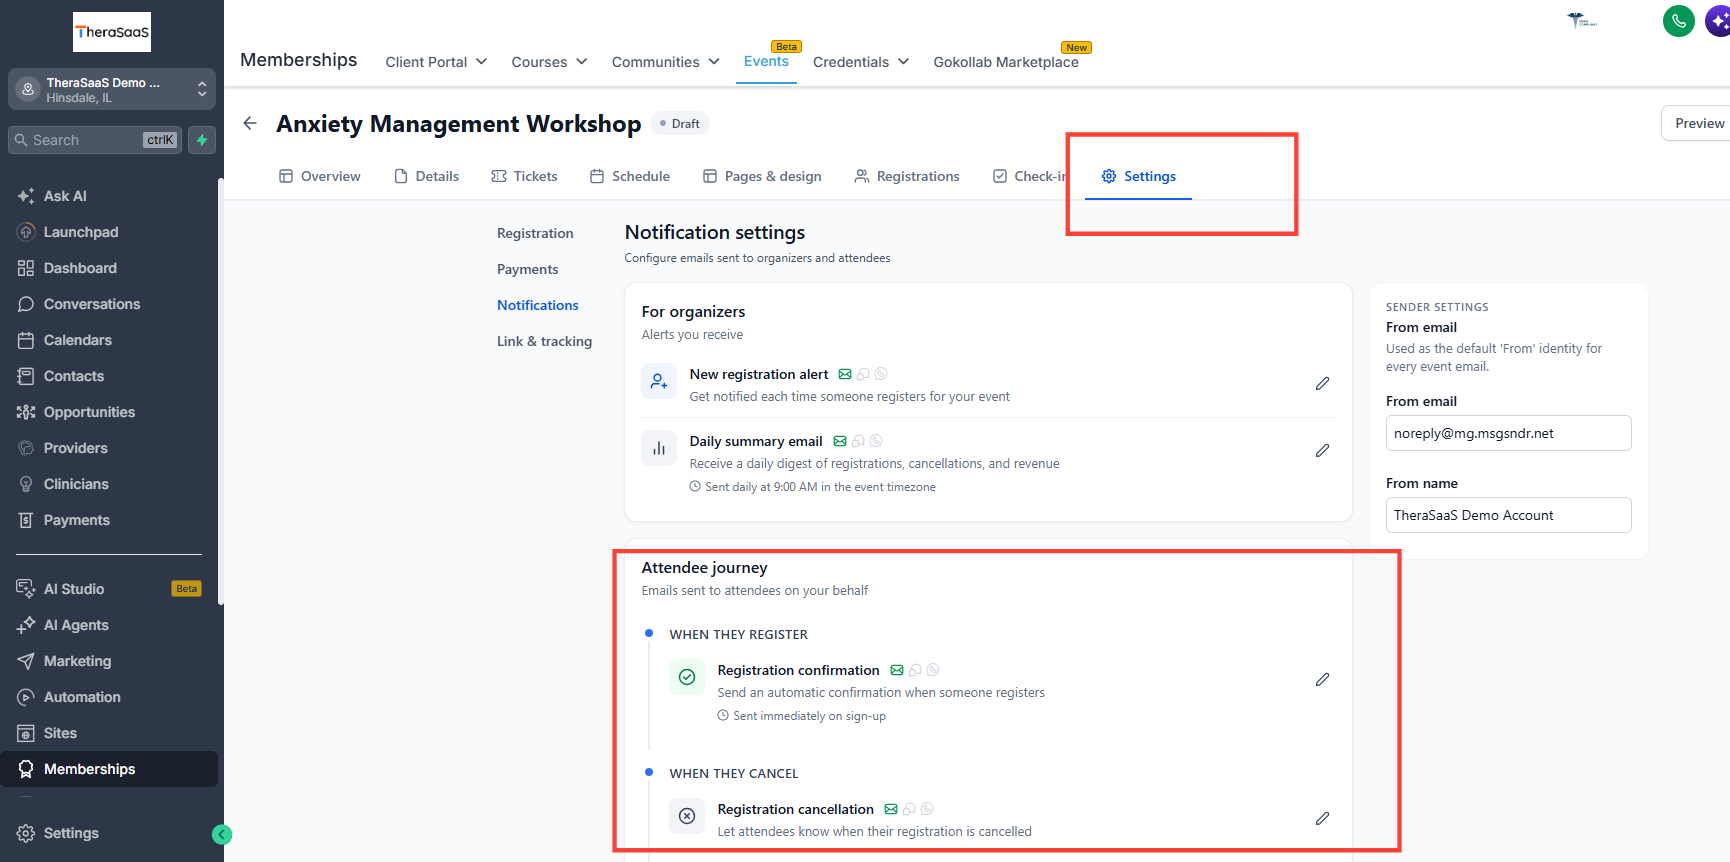
To set automated reminders, go to Events – Settings & edit internal notifications & automated confirmation/reminders for attendees.
3.3 Refunds & Cancellations
If you need to refund an attendee, you initiate that manually from the Registrations tab — attendees cannot request refunds themselves. Canceling or unpublishing an event does not automatically refund anyone; if you cancel a workshop, plan to process refunds yourself.
To process a refund, go to the event's Registrations tab — find the attendee's registration and initiate the refund from there.
4. General Rules & Guardrails
| Rule | Description |
|---|---|
| Ticketed vs. RSVP | Permanent choice made at event creation — cannot be switched later |
| Payment processing | Paid ticket tiers require Stripe (or another supported processor) connected to your account before checkout will work; free tiers don't need this |
| Ticket quantity limits | Enforced automatically across all forms, default or custom |
| Registration deadline | Defaults to event start time at the event level, but is not automatically enforced on custom embedded forms. You must manually unpublish or hide those |
| Refunds | Always manual, even if the event is canceled or unpublished |
| Card requirement for $0 tickets | Can be toggled off per form for fully card-free RSVP events |
| CRM sync | Only happens if the form was connected to tracking during setup |
Best practice: Run a full test registration yourself, as both a paid and free attendee if applicable before promoting the event.
5. Closing Out Your Event
Once your event date passes or capacity is reached, manually unpublish or hide the embedded form. Use the Registrations tab to pull your final attendee list, process any outstanding refunds, and export data for follow-up outreach.
6. Quick Setup Checklist
- Choose Ticketed or RSVP carefully — this can't be changed later
- Connect Stripe (or another processor) before setting up any paid ticket tier
- Create the event with name, date, location, and organizer details
- Set up ticket tiers with pricing, quantity caps, and sale windows
- Add any coupon codes for sliding-scale or partner discounts
- Build a registration form and attach it via Sell Products
- Copy the embed code onto your branded landing page
- Connect the form to CRM tracking when prompted
- Toggle off card requirement if running a free RSVP event
- Test the full registration flow before promoting
- Manually unpublish the form once registration should close
7. Frequently Asked Questions
Do I need anything set up before I can sell paid tickets?
Yes. Connect Stripe (or another supported payment processor) to your TheraSaaS account first. Paid ticket tiers can't process payment without one connected. Free ($0) tiers don't require this.
Can I switch an event from RSVP to Ticketed later, or vice versa?
No, this choice is permanent once the event is created. If there's any chance you'll charge later, start as Ticketed with a free tier.
Will TheraSaaS stop registrations once I hit my capacity limit?
Yes, ticket quantity limits are enforced automatically regardless of which form attendees use.
Will TheraSaaS automatically close registration after my deadline?
No. The event-level deadline applies to the default booking page, but custom embedded forms need to be manually unpublished or hidden.
Do I have to use TheraSaaS's default registration page?
No, you can use your own funnel, website, or AI-generated landing page and still get full ticketing, capacity, and check-in behind it.
Can I offer discount codes to specific attendees?
Yes, coupon codes support a percentage discount, a date range, and a usage limit, which works well for sliding-scale attendees or referral partners.
If I cancel an event, do attendees get refunded automatically?
No. Canceling or unpublishing an event does not trigger refunds. You'll need to process those manually from the Registrations tab.
Can I run a multi-session training with several speakers?
Yes, the event page supports a full schedule with multiple sessions and individual speaker profiles, which works well for provider trainings or multi-day workshops.
Can I manually register someone who signed up over the phone?
Yes, use Add Attendee in the Registrations tab to add them directly, bypassing the public checkout.
Do registrants automatically become contacts I can follow up with?
Only if the form was connected to CRM tracking during setup.
Was this article helpful?
That’s Great!
Thank you for your feedback
Sorry! We couldn't be helpful
Thank you for your feedback
Feedback sent
We appreciate your effort and will try to fix the article